On steel construction projects, when details are missing from the design drawings, solutions can be provided through the steel detailing process. The result can be an easily fabricated and erected structure. I encountered a situation like this when I was hired to create steel stair shop drawings for a mezzanine exit stair located at the Southern Tech A&P Building in Ardmore, Oklahoma. Many details were missing from the architect’s design drawings, and my team provided them. 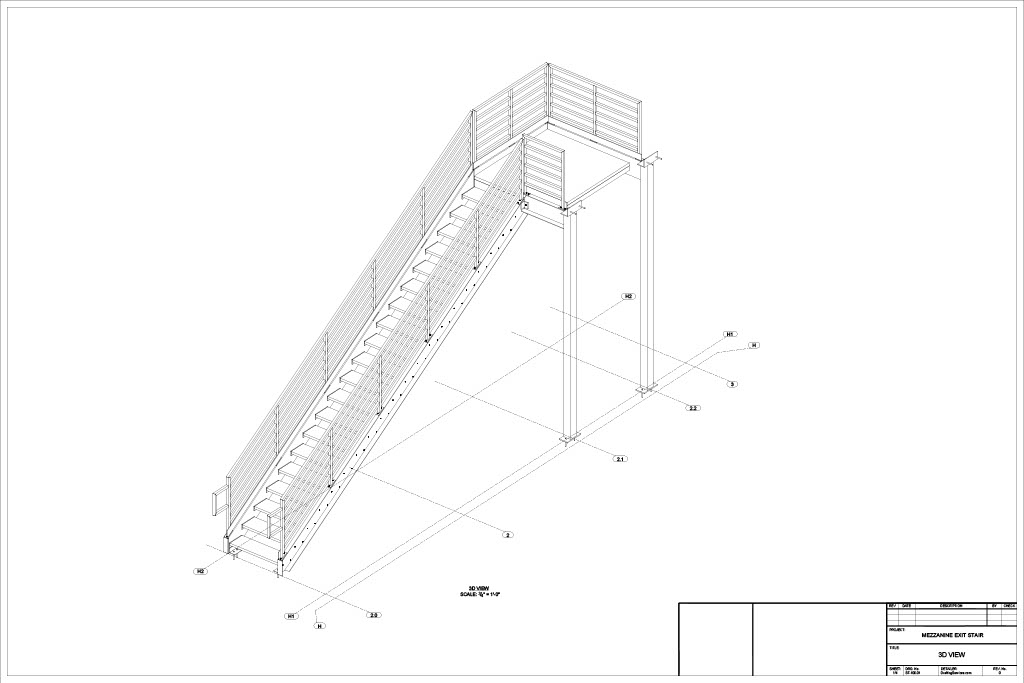
 Sheet of plans below.

Providing Robust Steel Stair Shop Drawings
For this steel stair project, after reviewing the contract drawings, we found many details missing. So we first thought through the best way to assemble the stair. After figuring that out, we then provided solutions for the missing details in our shop drawings. The result for our client was that it made the fabrication and erection processes easy.The Mezzanine Exit Stair
The mezzanine exit stair was very simple. It consisted of two posts, three beams, grating supporting angles and channels, two stringers, and handrails. Here is a drawing of the 3D view of the stair that we created in Tekla. Framing Plan & Framing Elevation
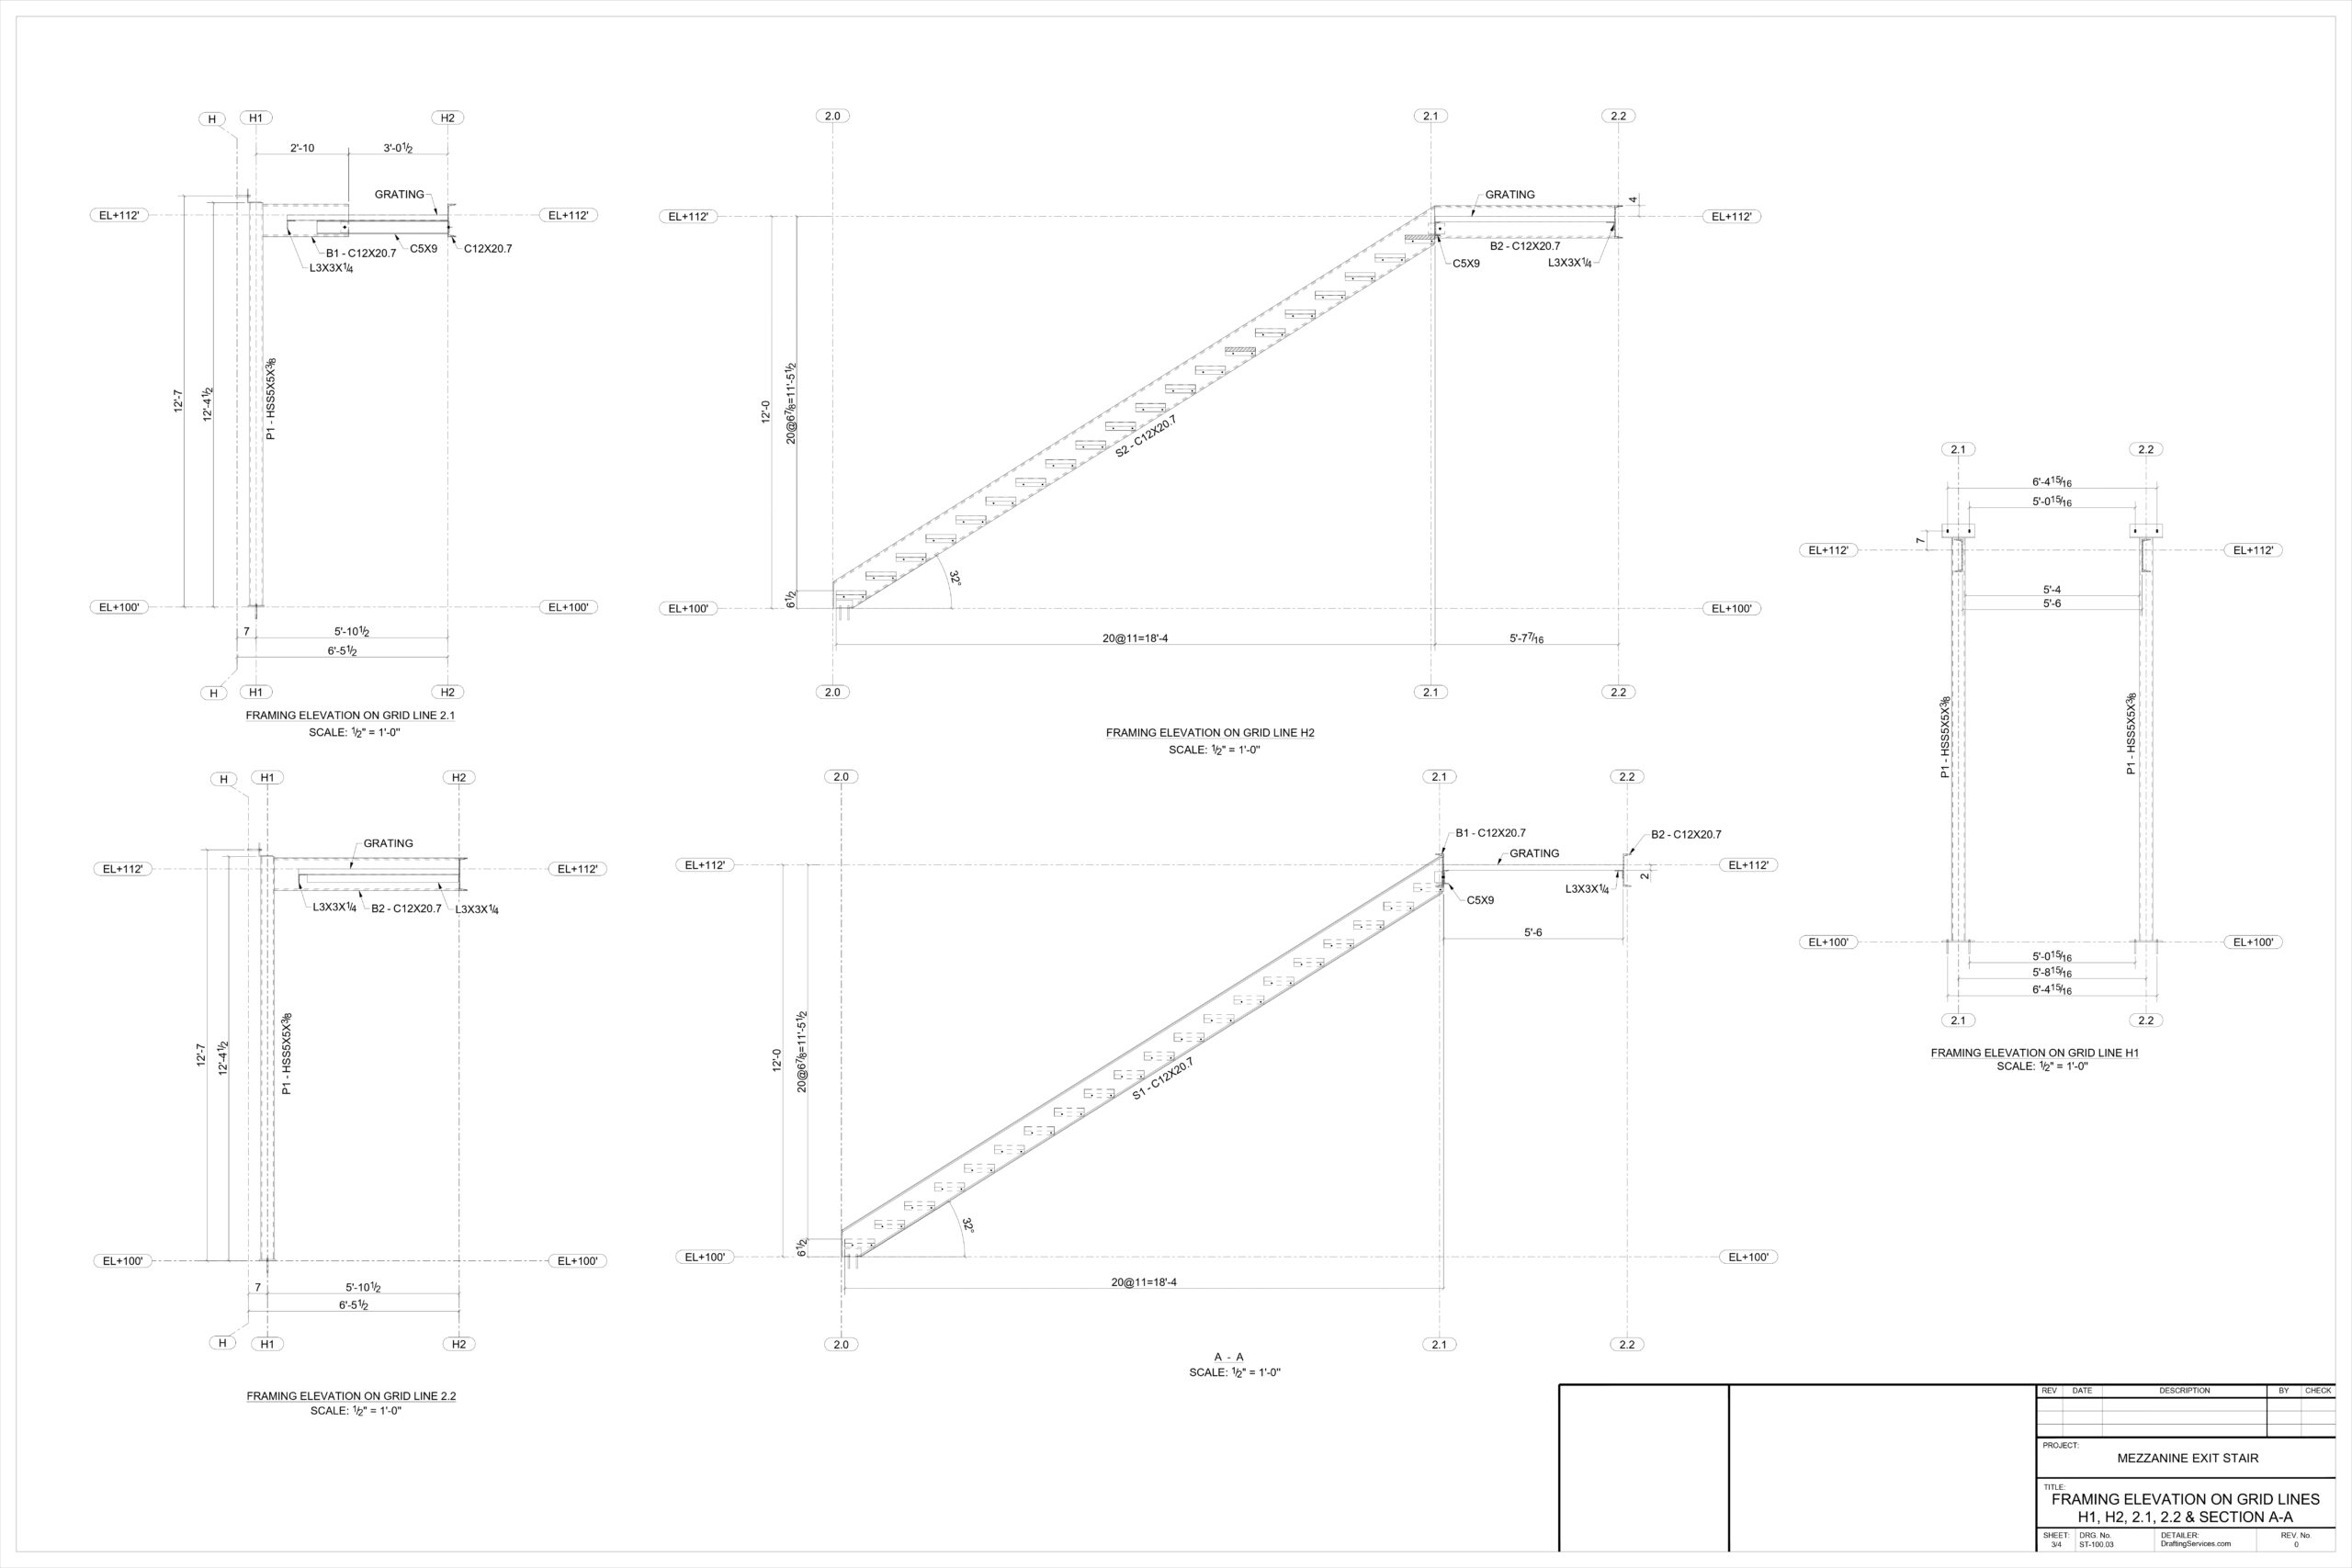
For the shops, we prepared one sheet for the different elevation views and another sheet for the plan views of the stair, both sheets shown below. The sheets show the L3x3x1/4 angles and the C5x9 channel supporting the grating of the landing. Also, suggesting welds played an important role by serving as rigid connections and therefore avoiding extra work in the shop like drilling, cutting, etc. The stringers are connected with welds on one end and and ¾” diameter A325N bolts on the other. Sheet of elevations below. Sheet of plans below. Connection Details, Grating & Handrails
The fourth sheet shows the connection details, grating, and handrails. In this sheet one can see the connections in detail. The left stringer is connected by just a plate welded to it and then bolted to the landing beam as shown on connection 5. The right stringer is connected by an angle welded to the stringer and then bolted to the landing beam as shown on connection 4. The handrails are connected to the top flange of the stringer or the landing beam using a welded plate and two bolts as shown in connection 6. Each of the connections shown below was detailed to be as simple as possible. Enabling our client to fabricate and erect the stairs easily.